Amaranth Microgreens: A Colorful and Nutrient-Dense Superfood
Share
Hello everyone! Ivan here from Green Chief. Today I want to share one of my favorite indoor crops for home growers and chefs alike — amaranth microgreens. These vibrant greens are packed with nutrients, easy to grow, and visually stunning on any plate.
What Makes Amaranth Microgreens Special?
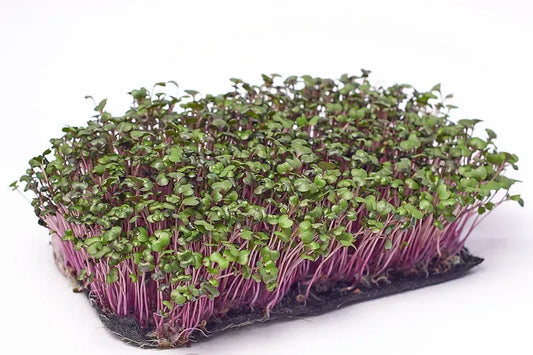
Amaranth microgreens offer a mild, slightly earthy flavor and a tender texture, making them ideal for salads, sandwiches, bowls, and food styling. Their pink stems and delicate green leaves instantly elevate the appearance of a dish.
Nutritional Benefits
As someone who grows and eats microgreens daily, I love amaranth for its nutritional density. Although values vary based on growing conditions, amaranth microgreens typically provide:
- Vitamins A, C, E, and K
- Minerals including calcium, iron, and magnesium
- Antioxidants and phytonutrients
- Plant-based proteins with essential amino acids (including lysine)
This makes them an excellent choice for people interested in microgreens nutrition and plant-based eating.
How I Grow Amaranth Microgreens at Home
Growing amaranth at home is straightforward, even for beginners. If you are just starting your microgreens growing journey, this crop is a great option.
What You Need
- A shallow growing tray
- A fine growing medium such as coconut coir, potting soil, or hemp mats
- Quality amaranth microgreen seeds
- Spray bottle for watering
- Light source (natural or LED grow light)
My Growing Method (Step-by-Step)
- Prepare the tray: Add moist growing medium and smooth the surface.
- Sow the seeds: Spread seeds evenly across the tray for dense but not overcrowded coverage.
- Blackout phase: Cover the tray and keep it in darkness for 2–3 days to encourage germination.
- Introduce light: After sprouting, uncover and provide 12–16 hours of light per day.
- Watering: Mist lightly to keep the substrate moist without soaking it.
- Harvest: Amaranth microgreens are usually ready in 7–14 days, reaching around 5–12 cm in height.
I grow both hydroponically and in soil, and both methods work well. Hydroponics produces clean harvests, while soil can deliver slightly richer color.
Storage and Freshness
After harvesting, I rinse the microgreens gently, let them dry, and store them in an airtight container with a paper towel. In the refrigerator, they stay fresh for about 5–7 days.
Culinary Uses From My Kitchen
Amaranth microgreens are incredibly versatile. For the best results, always add them just before serving. Here are a few simple ways I use them:
- On avocado toast with lemon and pepper
- In salads and Buddha bowls
- As a topping for soups and grain dishes
- Inside sandwiches and wraps
- As garnish for plated meals
If you enjoy food photography or plant-based recipes, you’ll love how these microgreens boost both nutrition and appearance.
Fun Facts About Amaranth
- Amaranth has been cultivated for thousands of years and was prized in ancient civilizations.
- It contains lysine, a valuable amino acid often lacking in other plant proteins.
- Amaranth microgreens are popular in urban farming and indoor microgreen systems because they grow quickly and require very little space.
Final Thoughts
From nutrition to flavor to aesthetics, amaranth microgreens have a lot to offer. They are one of the easiest ways to enhance your meals while practicing small-scale indoor gardening.
If you’re looking for a microgreen that is easy to grow, highly nutritious, and visually stunning, give amaranth a try. I grow them year-round and still enjoy every harvest.
Stay green and keep growing!
Ivan – Green Chief