How to Grow Microgreens: A Complete Beginner’s Guide
Share
Growing microgreens is a fun and simple process that doesn’t require special skills or expensive equipment. In just 7–14 days, you can enjoy fresh, healthy greens right from your windowsill. This guide will help you understand the basics and avoid common mistakes.
What Should You Know Before Germination?
Microgreens are young sprouts of vegetables, herbs, and grains harvested 5–14 days after germination. For successful growing, you’ll need:
- High-quality seeds (not chemically treated).
- A substrate or growing mat.
- A container with a lid or greenhouse cover.
- A spray bottle and access to light.
It’s important to maintain cleanliness, control humidity, and avoid overwatering.
Growing Microgreens – Step-by-Step Guide
No matter which type you choose, the basic process is the same:
- Prepare materials: tray, substrate (or mat), seeds, lid, spray bottle.
- Fill the tray with substrate – evenly, without compacting, about 2–3 cm layer.
- Spread the seeds evenly – do not bury them, just scatter on the surface.
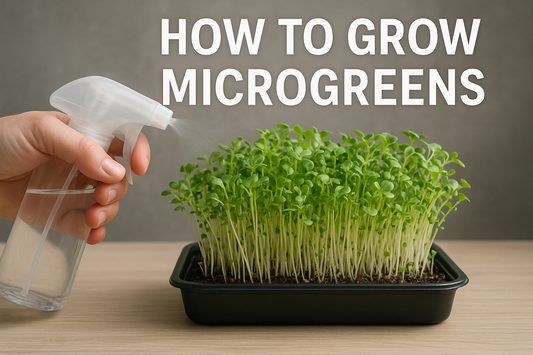
- Spray with water – lightly moisten (don’t flood!).
- Cover with a lid – create a “greenhouse effect” for germination.
- Place in a dark spot without direct light.
- After sprouts appear, air daily and mist lightly.
- Remove the lid completely once sprouts reach 2–3 cm.
- Move to light – windowsill or grow light.
- Water moderately – preferably from below or with a spray bottle.
- Harvest with scissors on day 5–14 at substrate level.
That’s it! Your microgreens are ready – fresh, crunchy, and packed with nutrients.
How Do Different Microgreens Germinate?
Different plants require different approaches. Some should be soaked, others sown dry. Here are the main features of popular types:
- Pea – large seeds, soak for 6–8 hours, sweet and juicy shoots.
- Sunflower – soak 8–10 hours, sprouts in 7–10 days, needs dense cover.
- Wheat – soak overnight, fast green shoots, popular for juicing.
- Cress – no soaking needed, germinates in 2–3 days, loves moisture.
- Mustard – small seeds, no soaking, fast growth, spicy taste.
- Cabbage (broccoli & kohlrabi) – no soaking, tender shoots, rich in sulforaphane.
- Basil – no soaking, needs stable temperature and light, aromatic.
- Radish – no soaking, quick growth, sharp flavor.
- Alfalfa – soak 6 hours, needs good ventilation, delicate structure.
- Onion – slow germination, no soaking, requires patience.
- Coriander – soak 6–8 hours, aromatic, sprouts in 7–10 days.
- Arugula – no soaking, fast sprouting, peppery flavor.
- Flaxseed – no soaking, requires even spreading.
- Sorrel – soak 4–6 hours, prefers cool conditions, sour taste.
- Amaranth – tiny seeds, no soaking, decorative red sprouts.
- Mung beans – soak 8 hours, grow quickly, crunchy and nutritious.
You can order any high-germination seeds right now. But first, check out these expert tips from Green Chief.
Additional Tips for Successful Germination
Follow the rule: “Better to underwater than overwater.” Excess moisture is the main cause of mold. Use a spray bottle and moisten the substrate as it dries.
Ensure proper ventilation. Air trays daily to maintain airflow and prevent mold.
Be patient. Harvest microgreens when they reach 5–7 cm tall. Use clean scissors.


